Essential Lighting Tips for Webcam Models: How to Look Your Best On Camera

Essential Lighting Tips for Webcam Models: How to Look Your Best On Camera

Looking your best on camera is crucial for webcam models. This comprehensive lighting guide teaches you how to create flattering, pro-level illumination with diffusers, strategic positioning, brightness adjustments, and pro lighting kits. Set up soft butterfly lighting, fill shadows, and craft an appealing backdrop to engage more viewers. Lighting is essential to upgrade your webcam shows – learn how to do it right!

Webcam Model Lighting Done Right: Expert Tips for Looking Amazing On Stream

Webcam modeling has exploded in popularity in recent years. With more amateur and professional webcam models joining popular cam sites like Chaturbate, MyFreeCams, Streamate, and more, it's becoming increasingly competitive to attract viewers and stand out from the crowd. That's why having truly professional, polished production quality with your webcam shows is so essential in this market.

One of the most important elements of creating an appealing, high-quality webcam show is proper lighting. Good webcam lighting eliminates unflattering shadows and glare, provides optimal visibility, and makes models look their absolute best on camera. With the right lighting techniques and equipment, webcam models can transform an amateur homemade setup into a studio-quality production.

In this comprehensive guide, we’ll cover all the key lighting strategies, equipment, and setups you need to know to properly light yourself as a webcam model. Follow these essential tips to take your webcam show lighting to the next level.

The Importance of Soft, Flattering Key Lighting for Webcam Models

The key light – your main light source pointed directly at you – has the greatest impact on how you'll appear on camera during your webcam shows. Harsh, direct lighting from an on-camera flash or bare overhead bulb can create sharp shadows under the eyes, nose, chin and other areas, resulting in an unprofessional, unattractive look.

The key to achieving attractive, professional webcam lighting is diffusing the key light source to create soft, natural-looking illumination on your face and body. Diffused lighting scatters the light particles and softens shadows to provide even, flattering lighting without harsh contrasts.

There are several ways webcam models can achieve well-diffused key lighting:

Use Large Diffuser Screens or Softboxes

One of the best diffusers for key lights are softboxes - collapsible square or octagonal boxes covered in translucent fabric. Larger softboxes diffuse the light more broadly and softly. Softboxes mount to your key lighting source to focus and direct the diffused light onto you. The larger the softbox, the softer and more flattering the lighting.

A budget lighting diffuser option are collapsible shoot-through umbrellas made of white translucent fabric. Umbrellas mounted to your key light act similarly to softboxes, scattering and softening the illumination. Umbrellas range from around 30 to 70 inches wide.

Other good diffusion materials are white opaque shower curtains, bed sheets, or large sheets of tracing paper. Anything white and translucent will help diffuse harsh lighting.

Choose Bulbs and Light Temperature for Flattering Light

Choosing lighting bulbs or lamps that provide naturally soft, warm light is also key, instead of cool, blue toned light which can look harsh and industrial.

Incandescent and halogen bulbs in the 2700-3000K color temperature range provide attractive warm light that flatters skin tones. Lower K numbers like 2700K provide the warmest, most flattering tones.

LED lighting can also produce soft light if filtered properly. Look for LED bulbs rated around 3000-3500K or that specify a warm white light. Avoid compact fluorescents which produce cooler, more clinical looking light.

Invest in Ring Lights for Optimal Webcam Model Lighting

While you can improvise DIY lighting solutions, getting dedicated lighting kits designed for video production will make a big difference in achieving professional, flattering illumination.

One of the most popular lighting choices among professional webcam models and streamers are ring lights. These circular LED lights provide optimal lighting for webcam work, with the light built right around the camera lens. This ensures the illumination falls perfectly on your face for minimized shadows. Look for dimmable, color temperature adjustable ring lights for maximum control.

Other Webcam and Video Lighting Options:

- LED Panel Kits – Contain LED light panels ideal for key and fill lighting. Some come with stands, diffusers and carrying bags.
- Softbox Lighting Kits - Higher end studio lighting kits include larger softboxes for perfectly diffused key lights along with light stands, bulbs and accessories.
- Smartphone Ring Lights - Compact and portable ring lights designed to easily mount smartphones. Great for travel.
- Diva Ring Lights - Ring lights with a diva makeup mirror built in. Allows checking makeup while lighting yourself.

Position Your Key Light Properly for Flattering Facial Lighting

Simply having a diffused key light isn't enough on its own – the precise positioning of your key light makes a big impact as well. You want to carefully place your key light in a position that provides the most flattering, professional illumination on your facial features.

Avoid Unflattering Top-Down Lighting

Having your key light source positioned directly overhead, like an overhead building lighting fixture, will often cause unappealing shadows in the eye sockets, under the nose, chin and other facial areas.

The optimal positioning is to have your key light placed at approximately a 45 degree angle or more to the side and above eye level. Overhead lighting should always be avoided.

Use Butterfly/Loop Key Lighting for Best Facial Results

The most flattering lighting pattern for models' faces is a butterfly or loop lighting setup where the key light illuminates the front of your face at a slight angle.

Position your soft key light source in front and 20-30 degrees above eye level. This lighting angle provides attractive illumination on facial features without harsh shadows.

To achieve loop lighting, position your look towards the light so the shadow of your nose points just toward the edge of your cheek on the opposite side. This creates a flattering shadow pattern similar to a butterfly wing shape.

![Diagram showing proper butterfly/loop key lighting position](loop-lighting-diagram.jpg)

*Ideal butterfly/loop lighting positioning for flattering facial illumination*

Loop lighting is commonly used in professional photography and cinematography to achieve optimal facial lighting. Follow this setup with your key light for the most flattering webcam lighting results.

Position Fill Lighting to Soften Remaining Shadows

Some faint shadows can be unavoidable even with perfect positioning of your key light. That’s why it’s important to also use fill lighting or reflectors to gently light those areas.

Positioning a soft fill light source on the opposite side of your key light will naturally fill in and soften any remaining shadows. Common fill lighting sources are reflectors, LED panels or a secondary softbox. The fill illuminates areas like eye sockets, under the nose and chin.

White foam boards are also often used as homemade reflectors, bouncing light back onto shadow areas for smooth, dimensional lighting. Pay close attention to common problem facial areas like around the eyes, nose and chin which typically need filled in.

Proper use of fill lighting is crucial for eliminating any harsh shadows for a clean, professional on-camera look.

Adjusting Brightness Levels and Background Lighting

It’s not only about the optimal positioning and diffusion of your key light. The proper brightness levels and color balance are also extremely important for attractive lighting:

Avoid Dim or Overly Harsh Lighting

Having sufficient lighting brightness for your webcam to pick up quality detail is crucial. If lighting on your face is too low or dim, image quality will appear grainy and colors will be washed out.

On the flip side, you want to avoid overlighting yourself to the point of blowing out your facial features or causing glare in the video. Use light meters or your webcam preview window to fine tune brightness to optimal mid-range levels.

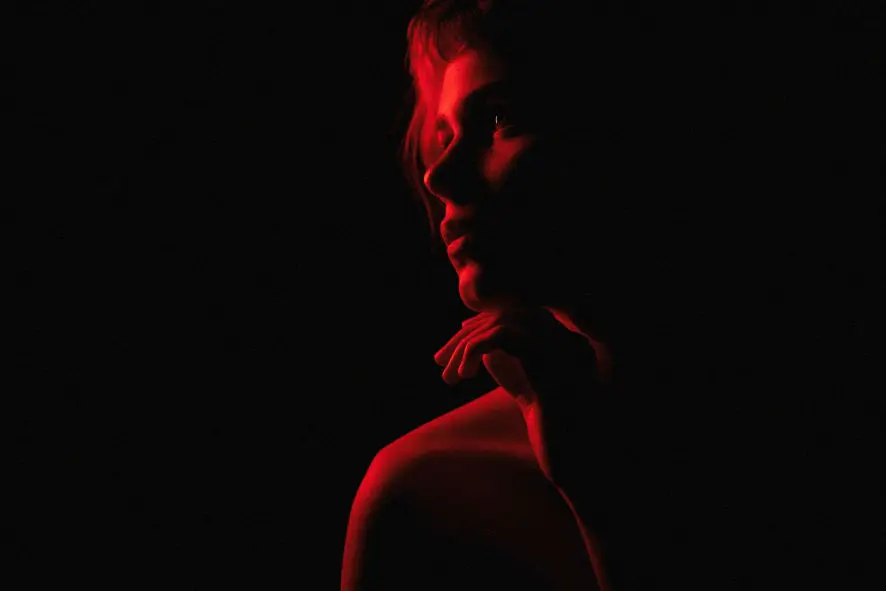
Match Color Temperature of All Lights

When using multiple lighting sources like key, fill and background lights, aim for consistent color temperature matching.

If your key light is a warm 3000K, your fill and backdrop lights should also be warm, avoiding mixing cool and warm light colors. Keeping a cohesive color balance avoids distracting mismatches between light sources.

Light and Treat Your Background Too

Don’t forget about properly lighting the background area behind you on your webcam shows. Ideally the backdrop should be subtly lit, avoiding uneven light or completely unlit backgrounds.

Use soft backlights, wall sconces or string lighting to gently illuminate background walls or surfaces. Solid colored backdrops like seamless paper can also brighten backgrounds. Just watch for bright spots or variations.

The background shouldn't pull too much attention from your face but still be visible. Dramatic contrast between very bright models against dark backgrounds should be avoided.

Recommended Lighting Kits for Webcam Models

We recommend investing in complete lighting kits designed for multimedia production instead of DIY piecing together random light bulbs and household lamps.

Here are some of our top picks for professional webcam lighting kits:

- Neewer 18” Ring Light Kit - Comes with camera mounted 6500K LED ring light, light stands, phone holder and carrying bag. Excellent for flattering facial lighting. Under $100.
- LimoStudio 700W Softbox Lighting Kit - Contains two softbox lights with stands, bulbs and carrying case for under $140. Great for key and fill lighting.
- Elgato Ring Light - Premium LED ring light that clips to desktop. Advanced color customization via app. Under $200.
- Fovitec Studio Triple Light Softbox Kit - Higher end kit with three softboxes, stands, bulbs and accessories. Over $200 but pro-grade lighting results.
- Emart 600W Continuous Lighting Kit - Day light balanced bulbs with huge softboxes and backdrop kit. High output for under $300.

Look at lighting kits on B&H Photo, Adorama, Amazon, photography stores or directly from brands like Elgato, Neewer, LimoStudio, and Fovitec. Aim for kits with lights, stands, bulbs, diffusers.

Common Webcam Lighting Mistakes to Avoid

Here are some common webcam show lighting mistakes inexperienced models make, that you’ll want to avoid:

- Only using backlight behind the head instead of proper front key/fill facial lighting
- No fill lighting used resulting in harsh shadows and uneven skin lighting
- Mismatching color temperatures between multiple lighting sources
- Distracting, cluttered background with uneven, distracting lighting
- Overall lighting that is too dim for quality visibility or overly harsh causing glare
- Lighting straight overhead instead of optimal 45 degree butterfly/loop position
- Placing all lighting flat against the wall instead of angled towards the face

By keeping your key light properly diffused and positioned for flattering illumination, adding fill lighting as needed, adjusting brightness and color balance, and lighting the backdrop, you'll achieve truly professional webcam lighting.

Conclusion

The lighting setup used on your webcam shows has a huge impact on the overall production quality and how good you as the model look on camera. Taking the time to properly set up flattering lighting will instantly upgrade your webcam streams from amateur looking to polished and professional.

Follow the in-depth tips in this guide to build the ideal lighting setup for webcam modeling. Your viewers will be impressed by how fantastic the video quality looks with proper studio-style lighting. With quality lighting equipment and optimal placement techniques, you’ll gain an advantage in standing out and engaging more fans and clients.

So invest in that ring light kit and softbox setup to take your webcam shows to the next level. Your hard work establishing the right lighting will translate to higher earnings potential over the long run.

FAQ

The key light, or your main light source pointed at you, is the most important. This should be large and diffused to create soft, flattering light on your facial features.

Large softboxes and umbrellas mounted to your key light create beautifully diffused lighting. Ring lights surrounding the camera also provide soft illumination directly on your face.

Warm light in the 2700K to 3000K range creates the most flattering skin tones and colors. Cool blue-toned light can look harsh and clinical.

Place your key light at a 45-degree angle in front of you, 20-30 degrees above eye level. This butterfly or loop lighting placement creates lovely front facial lighting.

Look for ring lights, softbox kits, and LED panel kits designed for video production. These contain diffusers, stands, quality bulbs and accessories.

Adding a fill light or reflector placed opposite the key light will gently fill in shadows for smooth, even lighting.

Subtly lighting your backdrop creates a polished, professional look and avoids uneven, distracting backgrounds.

Avoid overhead lighting, mismatching light colors, distracting backgrounds, and having lights too dim or harsh. Front butterfly lighting is best.

Use your webcam preview and light meters to fine tune brightness levels to not be too dim or cause glare.

It's better to get specialized video lighting kits with proper bulbs and diffusers. But in a pinch, household lamps can work if diffused.

Amazon, B&H Photo, Adorama, photography stores, or directly from brands like Neewer, LimoStudio, Elgato, Fovitec, and Emart.

Proper lighting results in much higher quality streams that attract more viewers and help you stand out as a professional model. Great lighting is crucial!

Built with ‌

Offline Website Builder